Attachments - Parapets
(Revised: 03/17/21)
The Parapet tab is
used to locate and define Parapets.
General comments:
·
Parapet geometry defined on this screen will not be lost if the building
geometry is redefined.
·
Note: If the Predefined or Custom
Shape is revised to a different shape, then all located and defined parapets
will be lost.
Parapets
can be located full span or partial span, dimensioned from the edge of a wall
or from any existing frame line.
Additional
adjustments for extending Parapets into Roof Extensions and skewing the corner
options are available.
Size:
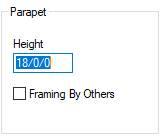
Height
Software
will default to a minimum height of 1/2/0 greater than the sidewall eave height
or end wall ridge height and then rounded up to the nearest 12 inches to ensure
enough room for all trim conditions.
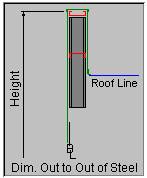
The
vertical height of the Parapet is defined as follow:
Parapets measured from the Finished Floor Elevation
to the Top Parapet Girt.
This is dimensioned to the outside of the secondary
steel structure, not to the outside of the panel or trim.
„
Notes:
Parapets with system generated framing must be
located on 8 1/2" outset walls with end frames located 1'-0" from the
endwall Building Line.
Verify that the rafter flange clears the parapet
posts. The maximum rafter flange is 7" at posts.
Parapets do not project from the walls.
Framing By Others
Select
if the Parapet framing is Not by the Metal Building Manufacturer.
Any
column offset or frame offset is permitted when Parapet Framing by Others is
selected.
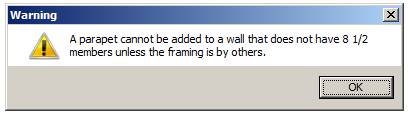
The
software will display the below warning with any non-standard endwall frame
location or any girt depth other than 8.5” with standard framing options.
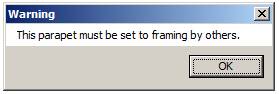
The
below dialog will display if you don’t select the Framing by Others checkbox.
„
How to use:
This would be used for Masonry Walls
that are extended for Parapets.
Location:
Full Span
This
radio button sets the overall length of the Parapets to the entire length of
the wall.
Partial Span
This
radio button sets the overall length of the Parapets to differ from the entire
length of the wall.
Additional
dimensioning options are activated including start and end options.
Start
Dimension:
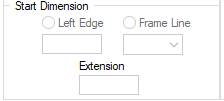
Left Edge
This
option is active with the Partial Span option.
When
selected, the Start Dimension of the Parapets will be dimensioned from the left
hand edge of the wall as you are standing outside the building facing the
selected wall.
Dimension
Enter
the dimension from the Left Edge or Frame Line to the beginning of the Parapet.
A
positive dimension moves the left edge of the Parapet toward the right edge. A
negative dimension moves the left edge of the Parapet away from the right edge.
Frame Line
This option is active with the Partial Span option.
When selected, the Start Dimension of the Parapet
will be dimensioned from the centerline of the frame selected.
A Start Extension may be required.
From this drop list, select the frame line number
that will be used to locate the end of the Parapet.
„
Notes:
Frame lines are numbered 1, 2, 3, etc.
from the left edge as you are facing the selected wall, with frame line 1 being
the left most frame.
Extension
Enter
the dimension from the Left Edge or Frame Line to the beginning edge of the Parapet.
A
positive dimension extends the left end of the Parapet.
A
negative dimension decreases the left end of the Parapet.
End Dimension:
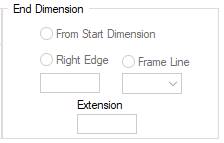
From Start Dimension
This
option is active with the Partial Span option.
When
selected, the End Dimension of the Parapet will be dimensioned from the Start
Dimension.
Right Edge
This
radio button is active with the Partial Span option.
When
selected, the End Dimension of the Parapet will be dimensioned from the right-hand
edge of the wall as you are standing outside the building facing the selected
wall.
Dimension
Enter
the dimension from the Right Edge or Frame Line to the end of the Parapet.
A
positive dimension moves the right edge of the Parapet toward the left edge.
A
negative dimension moves the right edge of the Parapet away from the left edge.
Frame Line
This option is active with the Partial Span option.
When selected, the End Dimension of the Parapet
will be dimensioned from the centerline of the frame selected.
An End Extension may be required.
From this drop list, select the frame line number
that will be used to locate the end of the Parapet.
„
Notes:
Frame lines are numbered 1, 2, 3, etc.
from the left edge as you are facing the selected wall, with frame line 1 being
the left most frame.
Extension
Enter
the dimension from the Right Edge or Frame Line to the beginning edge of the Parapet.
A
positive dimension extends the right end of the Parapet.
A
negative dimension decreases the right end of the Parapet.
Standard
Controls:
See also: