Frame Data – Work Points
(Revised: 04/01/08)
This
explains the different location methods that can be used in the Frame Data
Editor
|
|
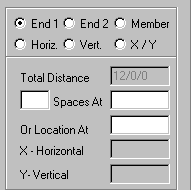
The software has a variety of ways to locate parts on
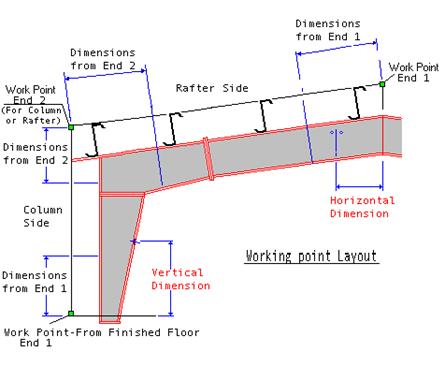
rafter and column frame sides: End 1-If the End 1 radio button is selected, any locations
or spaces that are inserted will be located along the roof or wall plane from
the End 1 WP. (See the WP layout below) End 2-If the End 2 radio button is selected, any locations
or spaces that are inserted will be located along the roof or wall plane from
the End 2 WP. (See the WP layout below) Horizontal-If the Horizontal radio button is
selected, any locations that are input will be located horizontally from the ridge
WP. Note that this option is only available for rafter frame sides. Note: This option is especially useful for locating
web holes or flange inside holes for GC11_ clips. Vertical- If the Vertical radio button is selected, any
locations that are input will be located vertically from the column WP at End
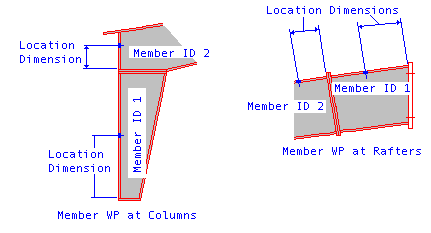
1. Note that this option is only available for column frame sides. Member-If the member radio button is selected, holes,
clips, etc. will be located along the flange (FO,FI) or web of the member
that you select in the member ID box. These locations will not include the
thickness of the end plate of the member. |
|
|
X/Y- If the X/Y radio
button is selected, any locations that are input will be located vertically from
the WP at End 1 (Y dimension) and horizontally (X dimension). Any Y dimension
from the ridge will be negative as shown to the right. Note that when an X/Y
location is input, it cannot be revised, it must be re-input. For that and
other reasons, X/Y location should only be used when no other option is
available. |